New ZK Project
From Documentation
![]() Notice: We recommend you to create a ZK project with a comprehensive build tool like Maven or Gradle since they can solve the library dependency problem.
Notice: We recommend you to create a ZK project with a comprehensive build tool like Maven or Gradle since they can solve the library dependency problem.
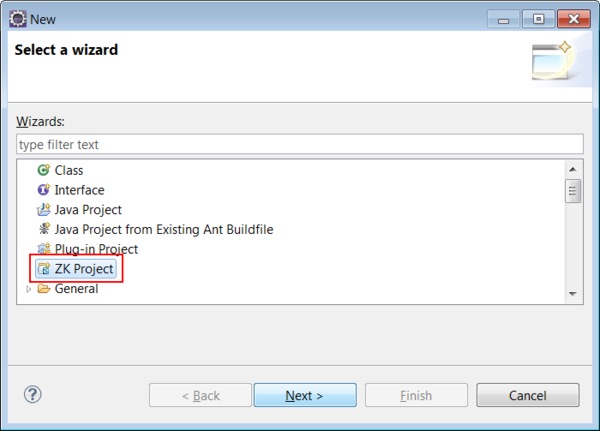
To create a new ZK Project, go to [File]/[New]/[Others] and select ZK > ZK Project, then choose your ZK Package and sit back while ZK Studio does the rest for you.
- Click [File]/[New]/[Other...]/[ZK Project] in Eclipse main menu.
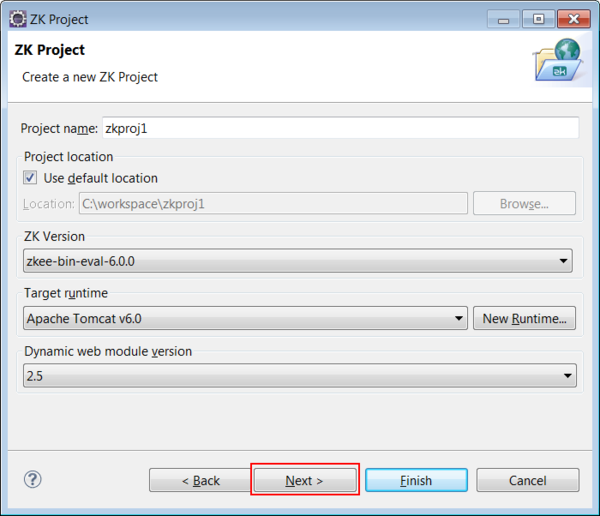
- Type the project name. Eclipse will automatically include the default ZK package configured in the ZK Package preferences, however, you can select any other installed ZK package by selecting it from the combo box. Then, click Next.
- We recommend you to use the latest ZK Packages to get the most features and performances. You can download the latest ZK packages here and import it into ZK Studio, please refer to Import ZK Binary Distribution From Local File System
- You can modify the Source folders and Default output folder if you like. Then, click Next.
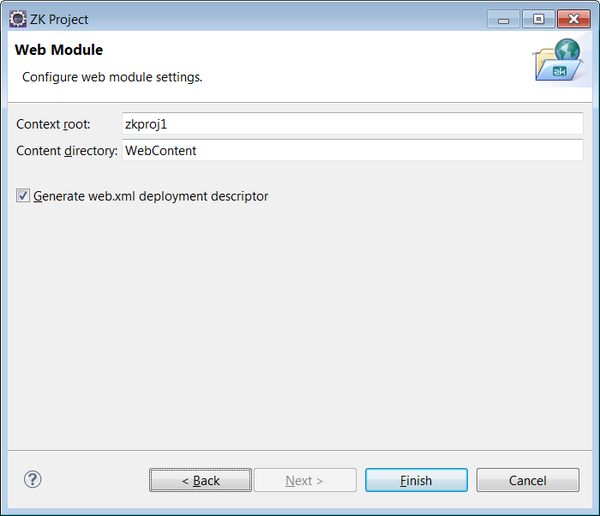
- You can modify Context root or Content directory if you like. Then, Click Finish.
- After clicking Finish, the New Project Wizard will setup the ZK Project ready for development.


